

How to Complete KYC on Bitget EU: A Step-by-Step Guide for New Users
What Is KYC and Why Does Bitget EU Require It?
Account Security
Full Access to Bitget EU Services
-
Fiat and crypto deposits
-
Withdrawals to external wallets and bank accounts
-
Spot trading
-
All other platform features available under EU regulation
Regulatory Compliance
How Bitget EU Handles Your KYC: Powered by Sumsub
Before You Begin: What You Will Need
|
Requirement
|
Details
|
|
Valid government-issued ID
|
Passport, national ID card, driver's licence, or residence permit
|
|
Device with a working camera
|
Smartphone, laptop with webcam, or tablet
|
|
Stable internet connection
|
Required for document upload and facial verification
|
|
Registered phone number
|
For OTP (one-time password) verification
|
|
Registered email address
|
For notification receipt
|
|
Good lighting
|
Natural or artificial, no backlighting or shadows
|
|
Plain background
|
White or neutral for facial verification accuracy
|
Step-by-Step: How to Complete KYC on Bitget EU
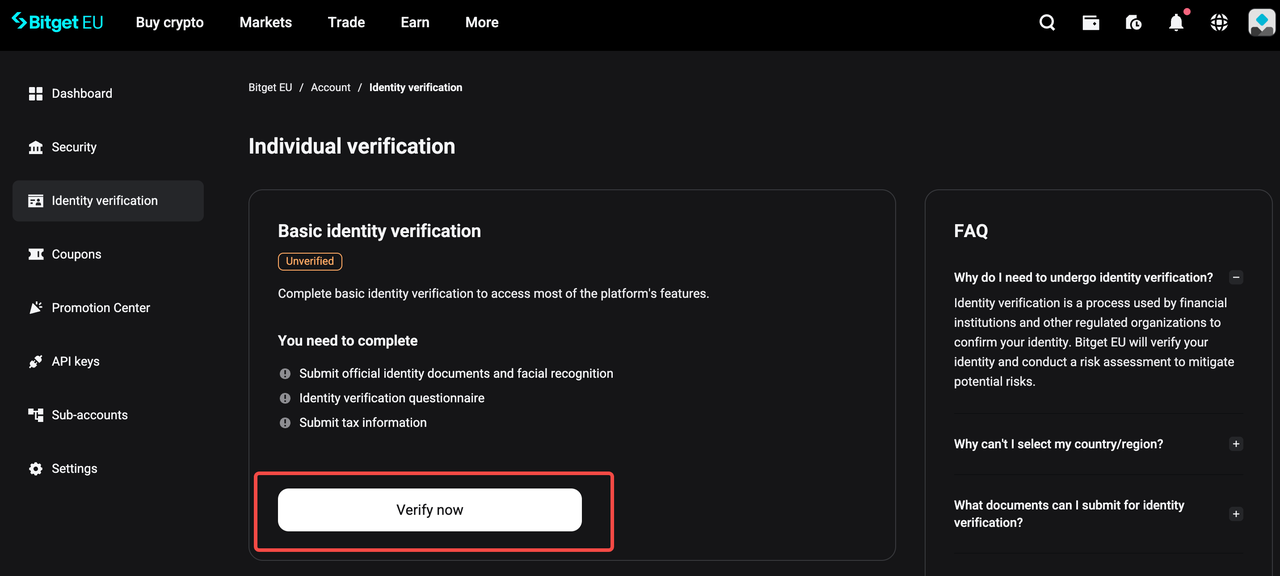
Step 1: Navigate to Identity Verification
1. Log in to your Bitget EU account via the official website.
2. Click on your profile icon in the top-right corner of the screen.
3. Select Identity verification from the dropdown menu.
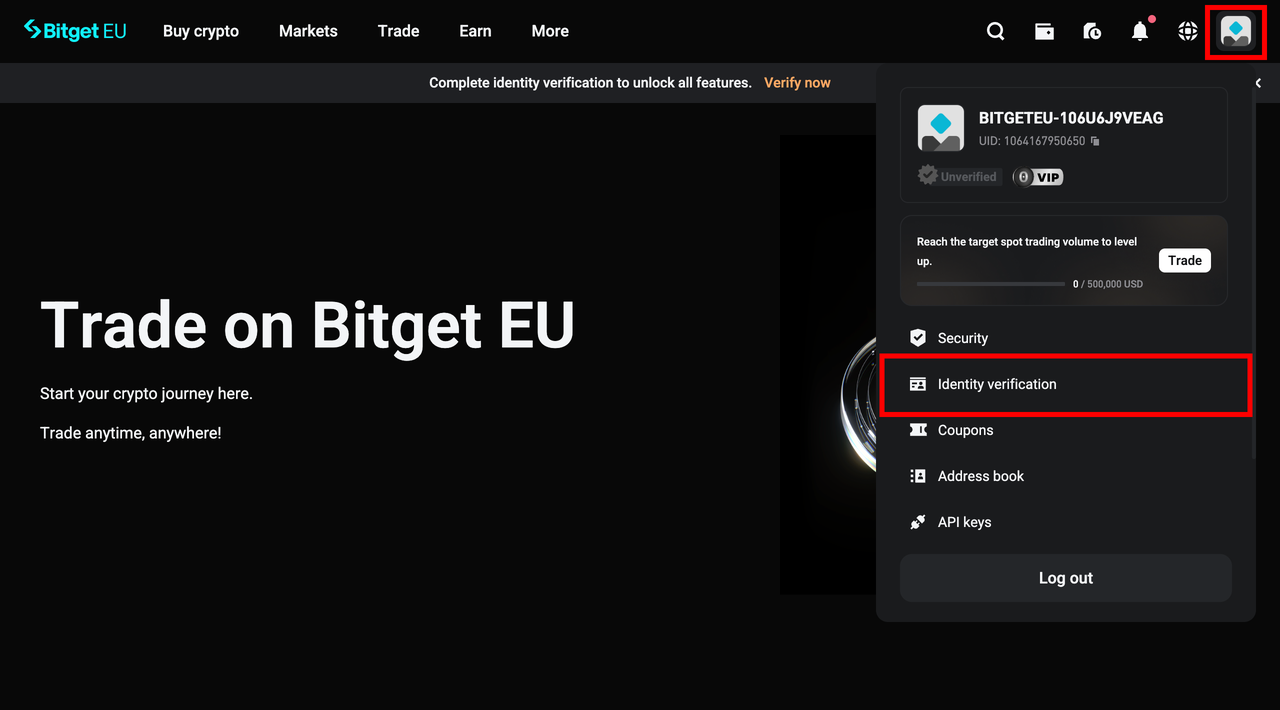
4. You will be taken to the Identity verification page. In the Individual verification section, click [Verify Now] to begin.
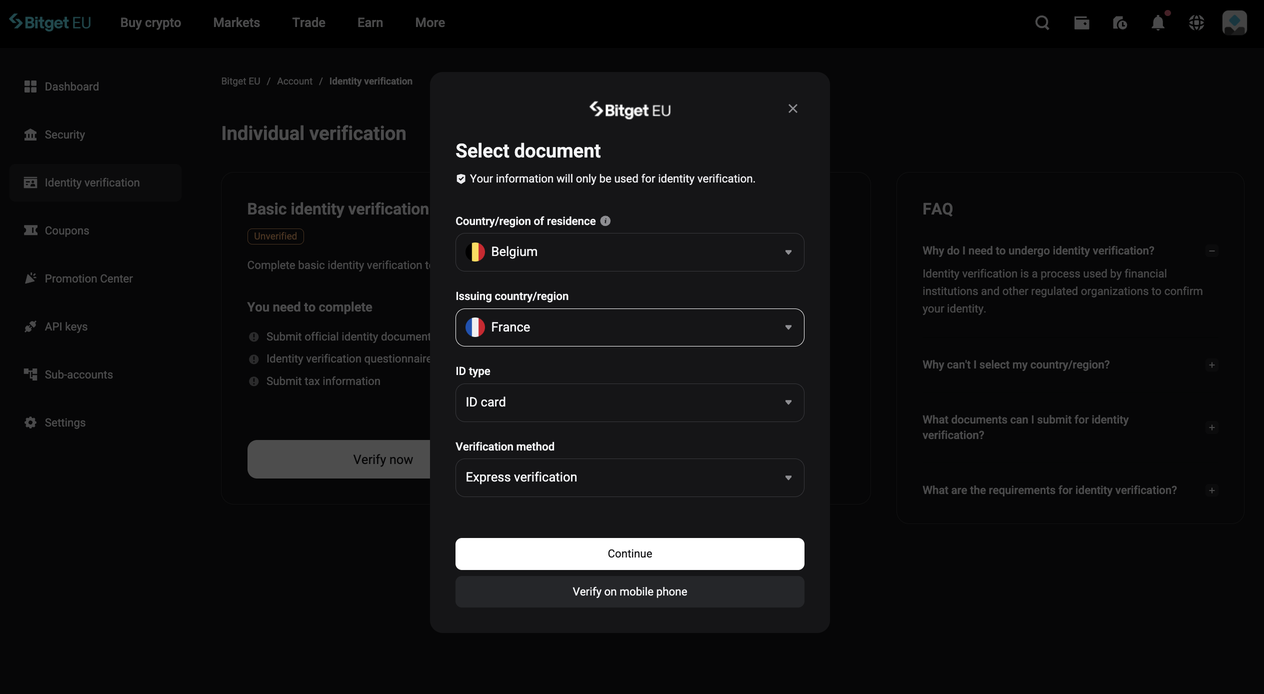
Step 2: Select Your Country and ID Type
-
Your Country/Region of Residence
-
Your Issuing Country/Region (the country that issued your ID document)
-
Passport
-
National Identity Card
-
Driver's Licence
-
Residence Card
|
Method
|
Description
|
|
Express Verification (Recommended)
|
Complete a qualified electronic signature quickly and securely online in minutes
|
|
Video Verification
|
A professional representative guides you through the process via live video call
|
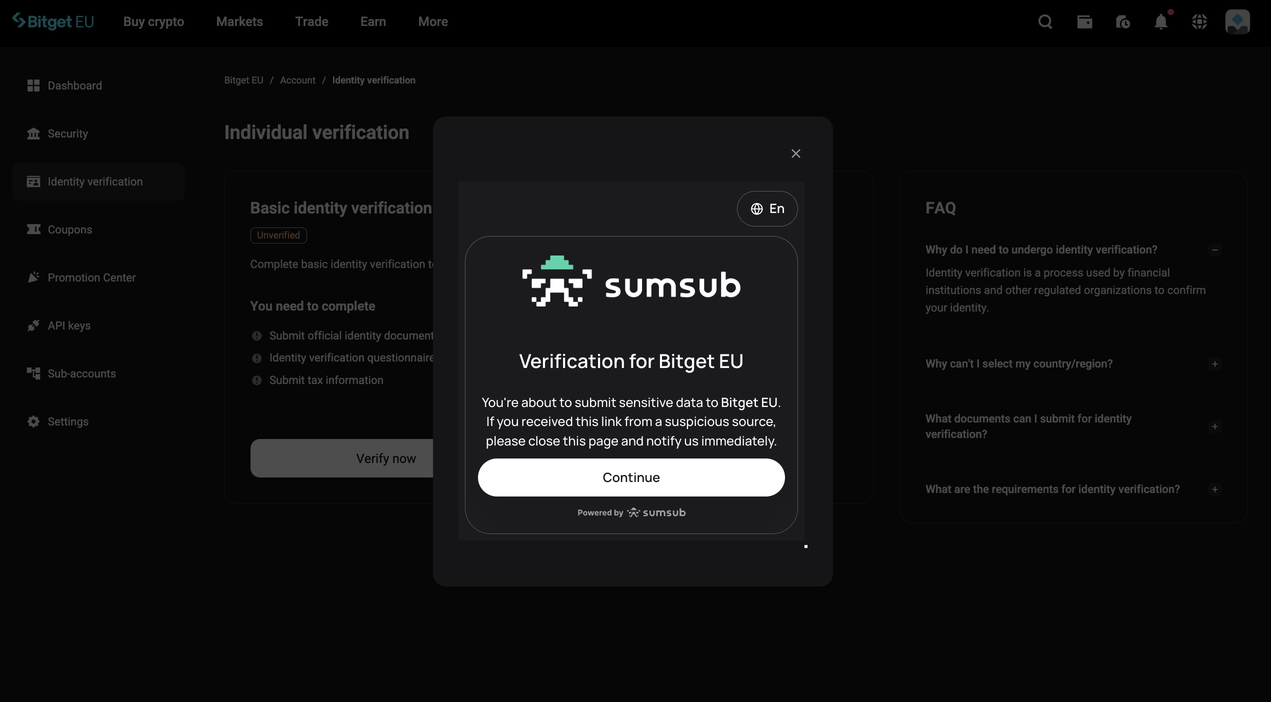
Step 3: Confirm the Legitimacy of the Sumsub Link
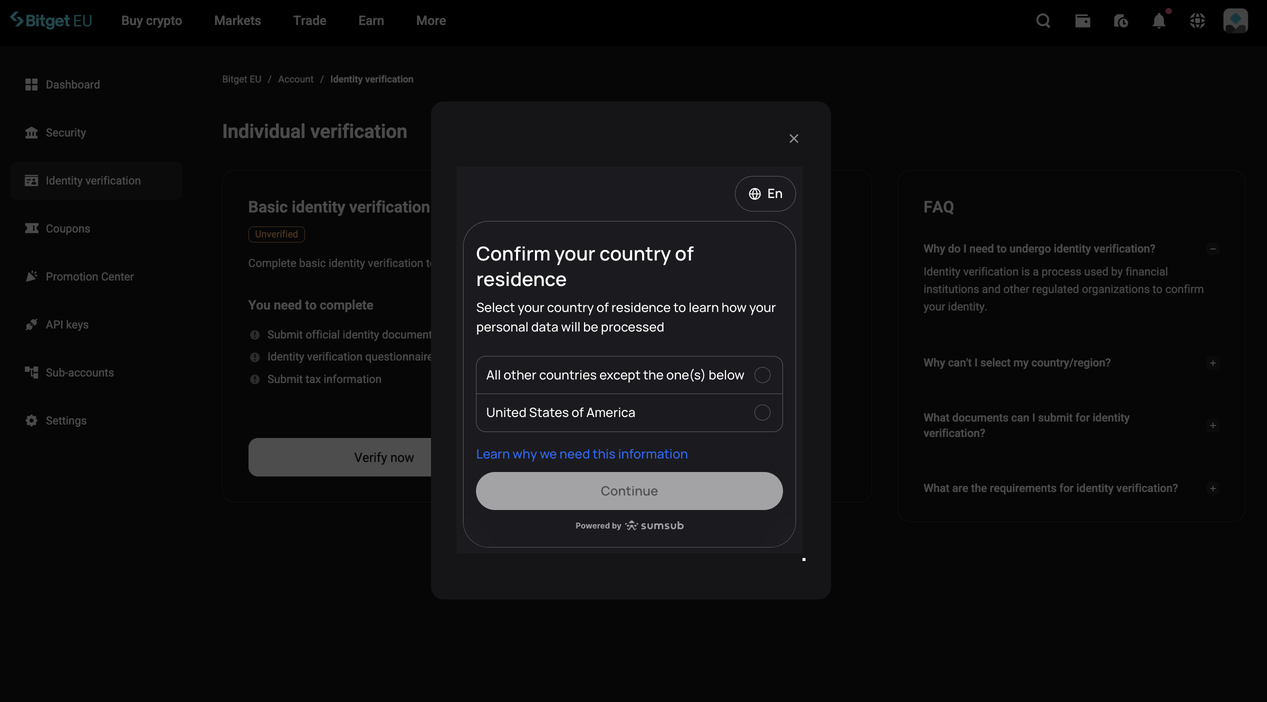
Step 4: Confirm Your Country of Residence
-
All other countries (except those listed below)
-
United States of America
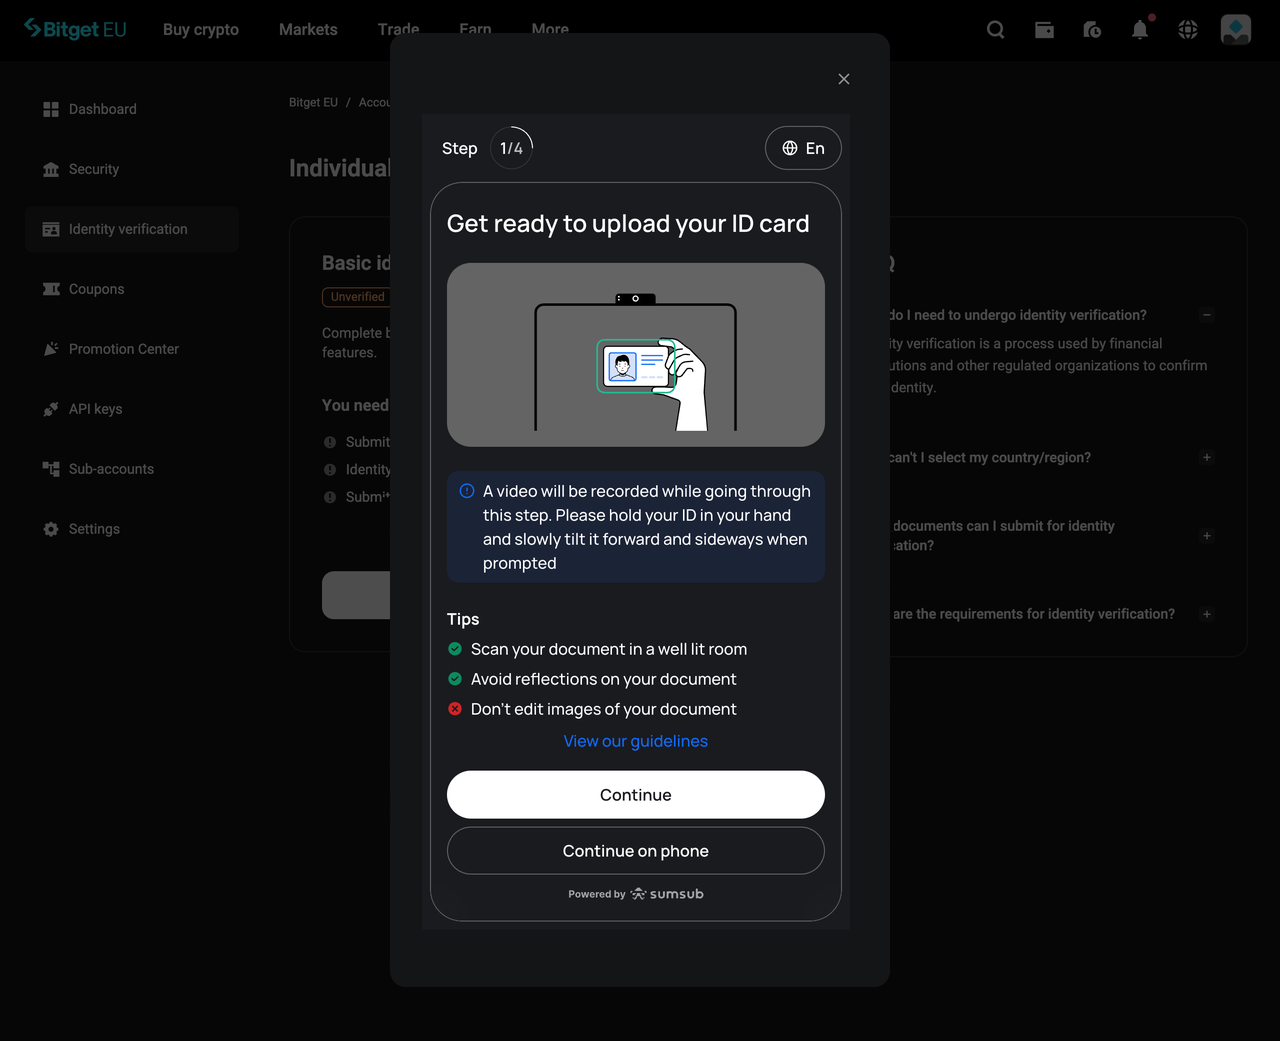
Step 5: Upload Photos of Your Identity Document
-
Present your document flat on a well-lit, plain surface
-
Ensure all text, numbers, and photos on the document are sharp, legible, and fully visible within the frame
-
Avoid glare, shadows, or obstructions
-
Do not crop or digitally alter the image in any way
-
Enable camera access on your device when prompted
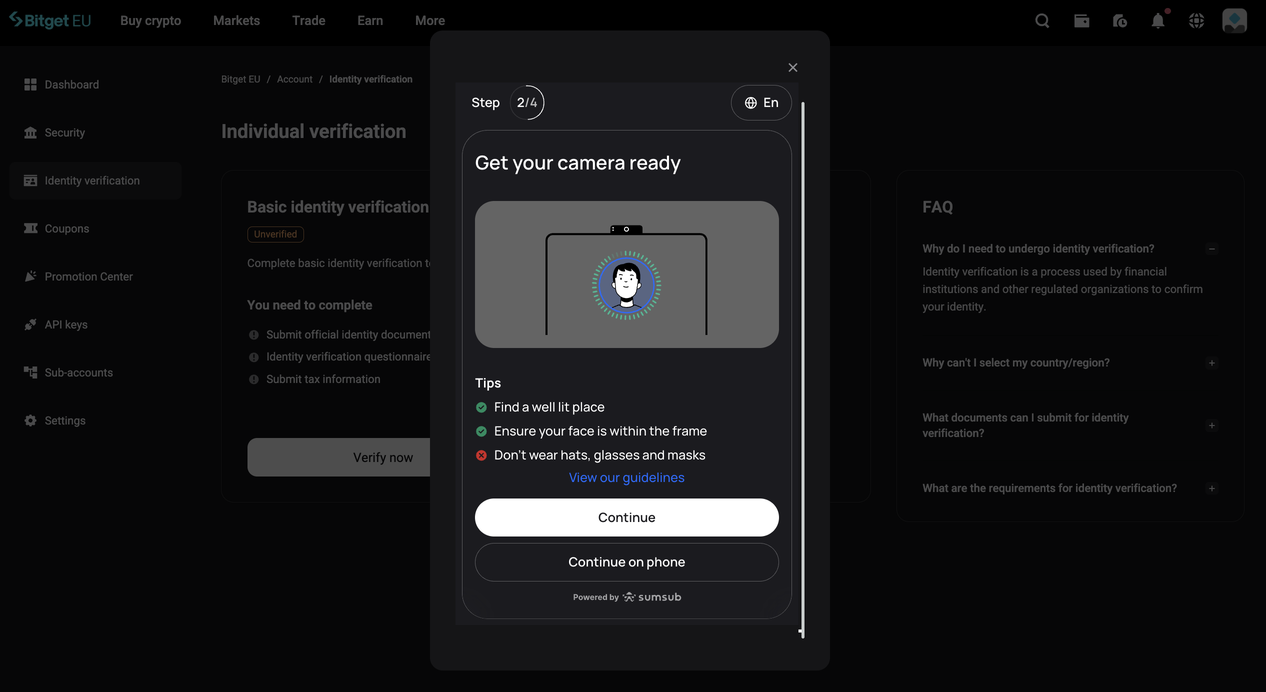
Step 6: Complete Facial Verification (Liveness Check)
-
Turn your head slowly to the left or right
-
Hold a neutral expression while facing the camera directly
-
Use a plain white or neutral background
-
Ensure you are in a well-lit environment; avoid windows or light sources directly behind you
-
Remove hats, sunglasses, heavy-framed glasses, or any accessories that cover your face
-
Keep your face centred in the frame throughout the process
-
Avoid making exaggerated expressions
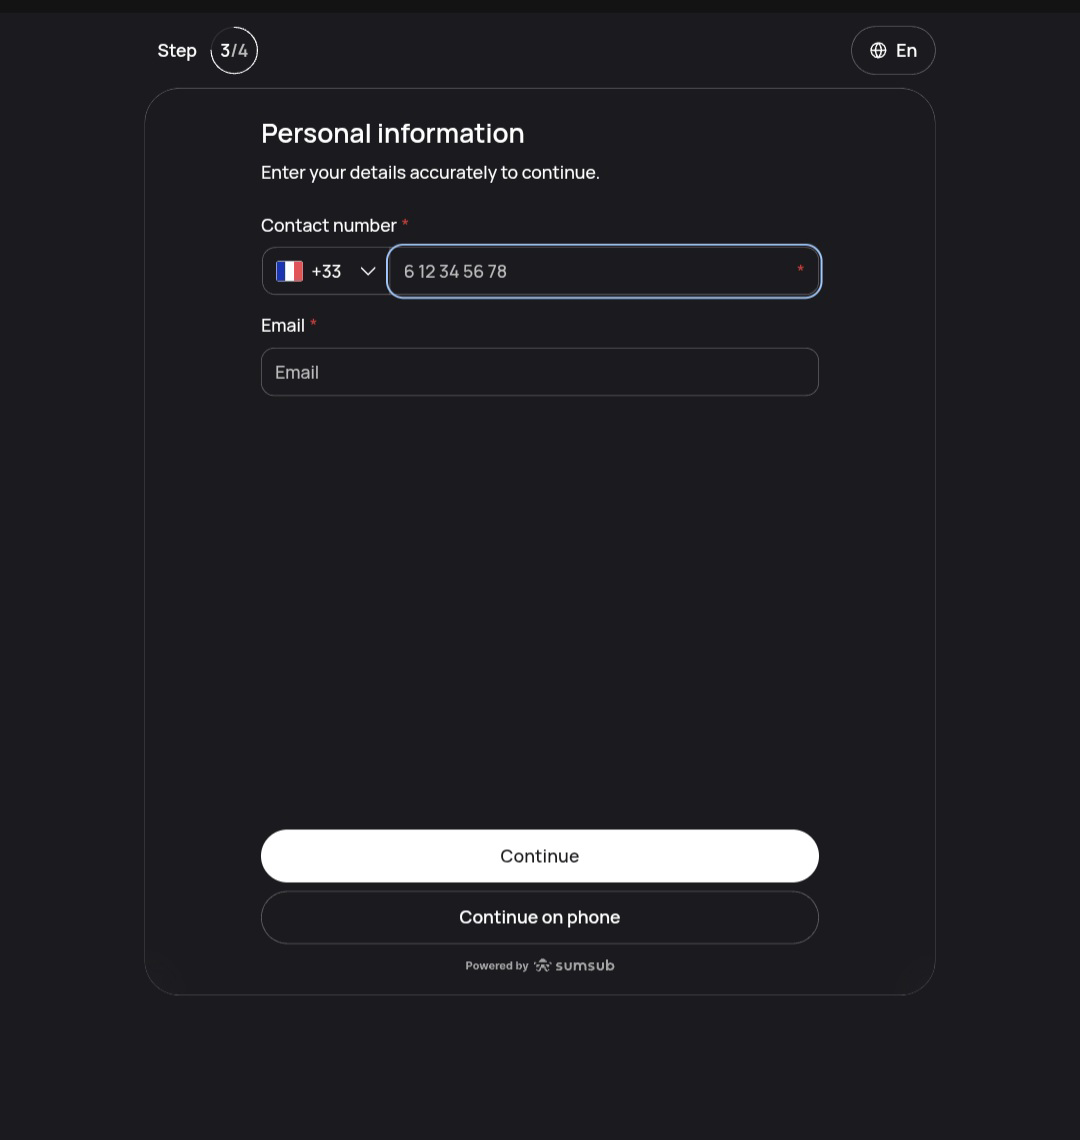
Step 7: Enter Your Contact Details
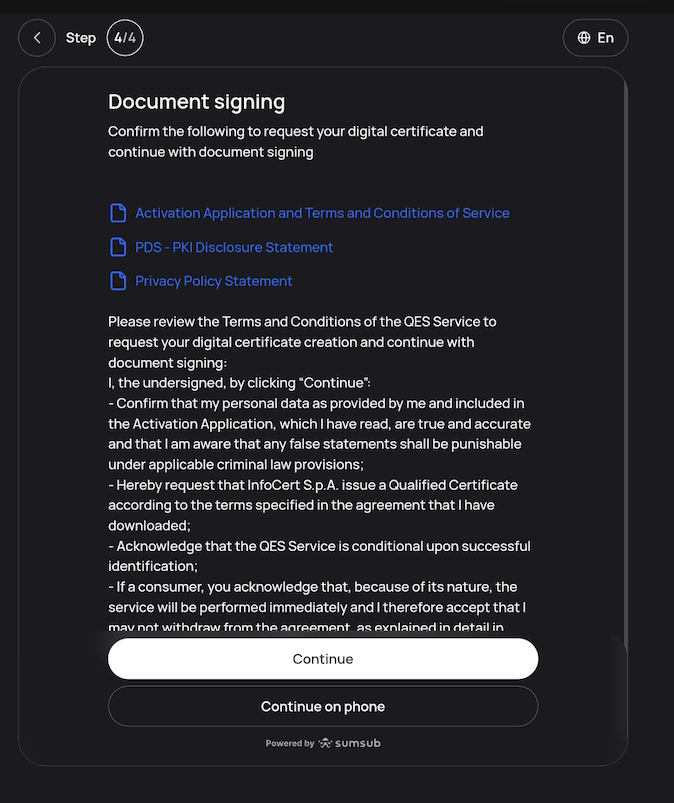
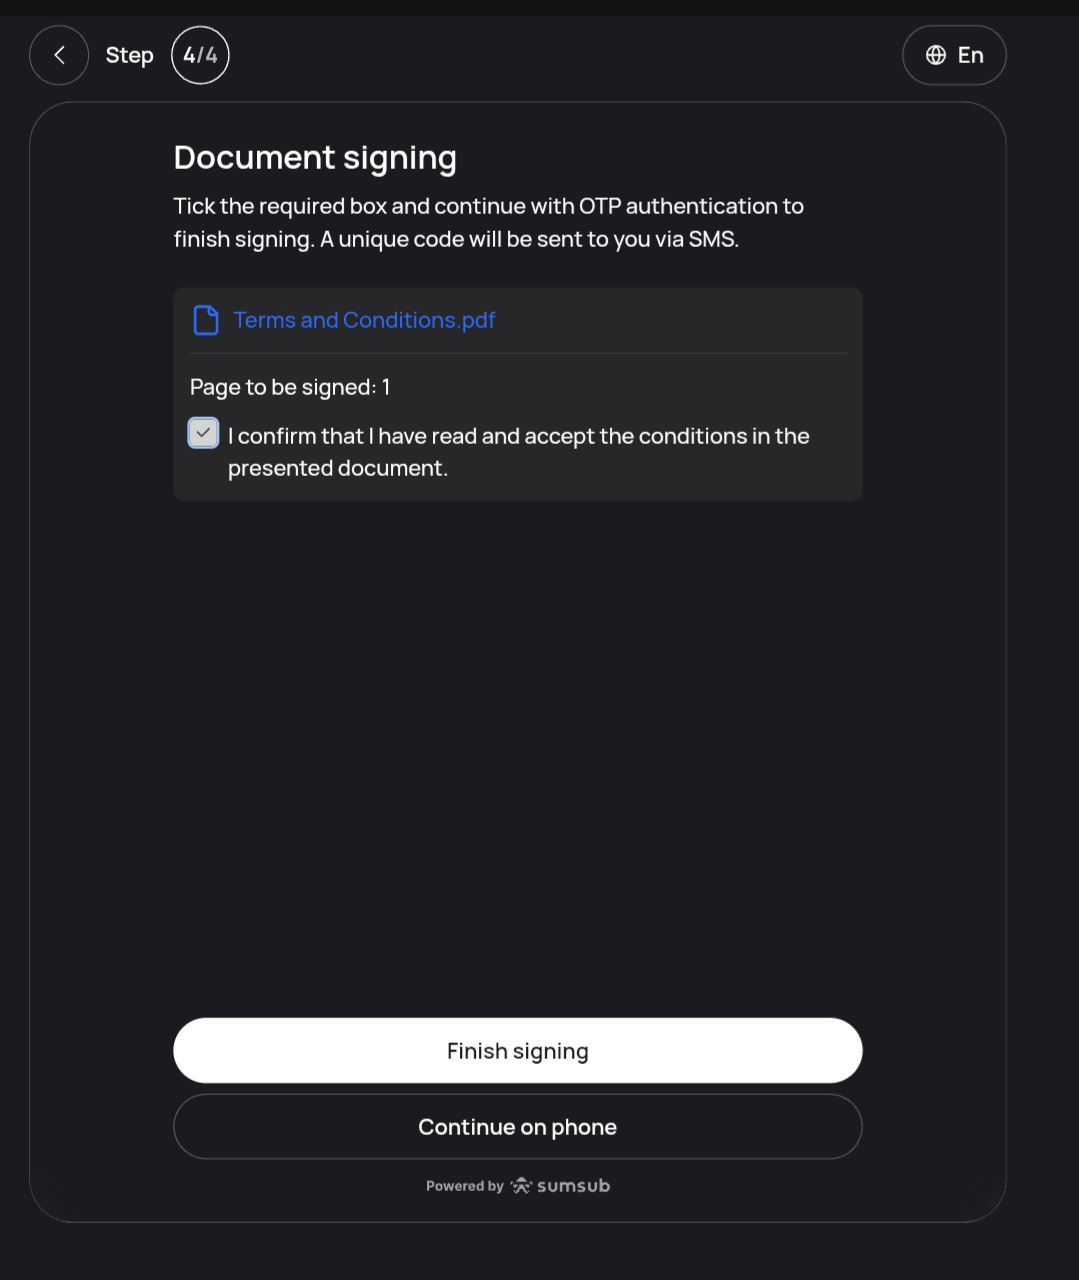
Step 8: Sign the Required Documents
1. Read through the presented documents carefully.
2. Tick the confirmation box: "I confirm that I have read and accept the conditions in the presented document."
3. Click [Finish Signing] to proceed.
You may be asked to review and electronically sign required legal/compliance documents. This helps ensure we can provide services and complete onboarding in line with applicable requirements.
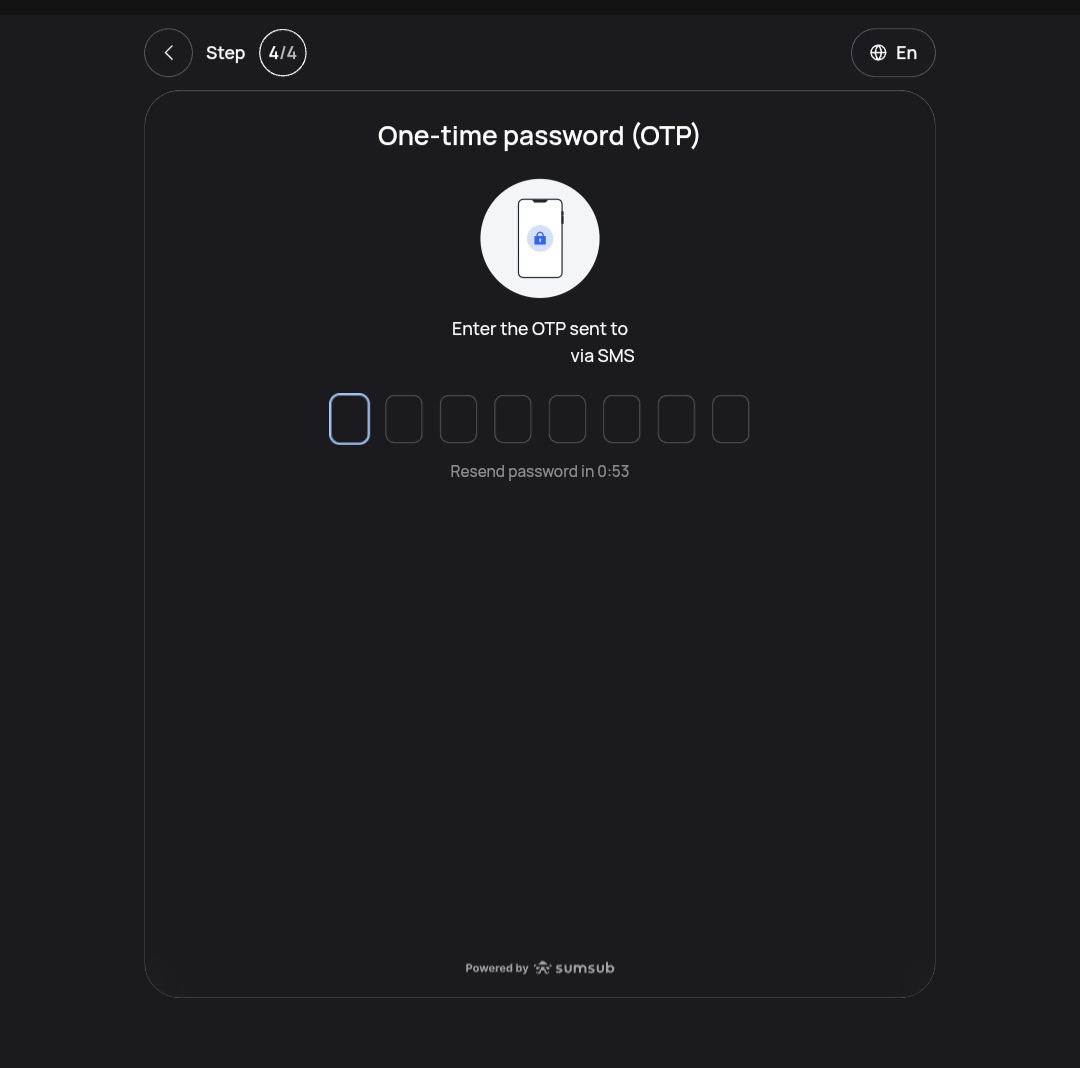
Step 9: Enter the OTP Sent to Your Phone
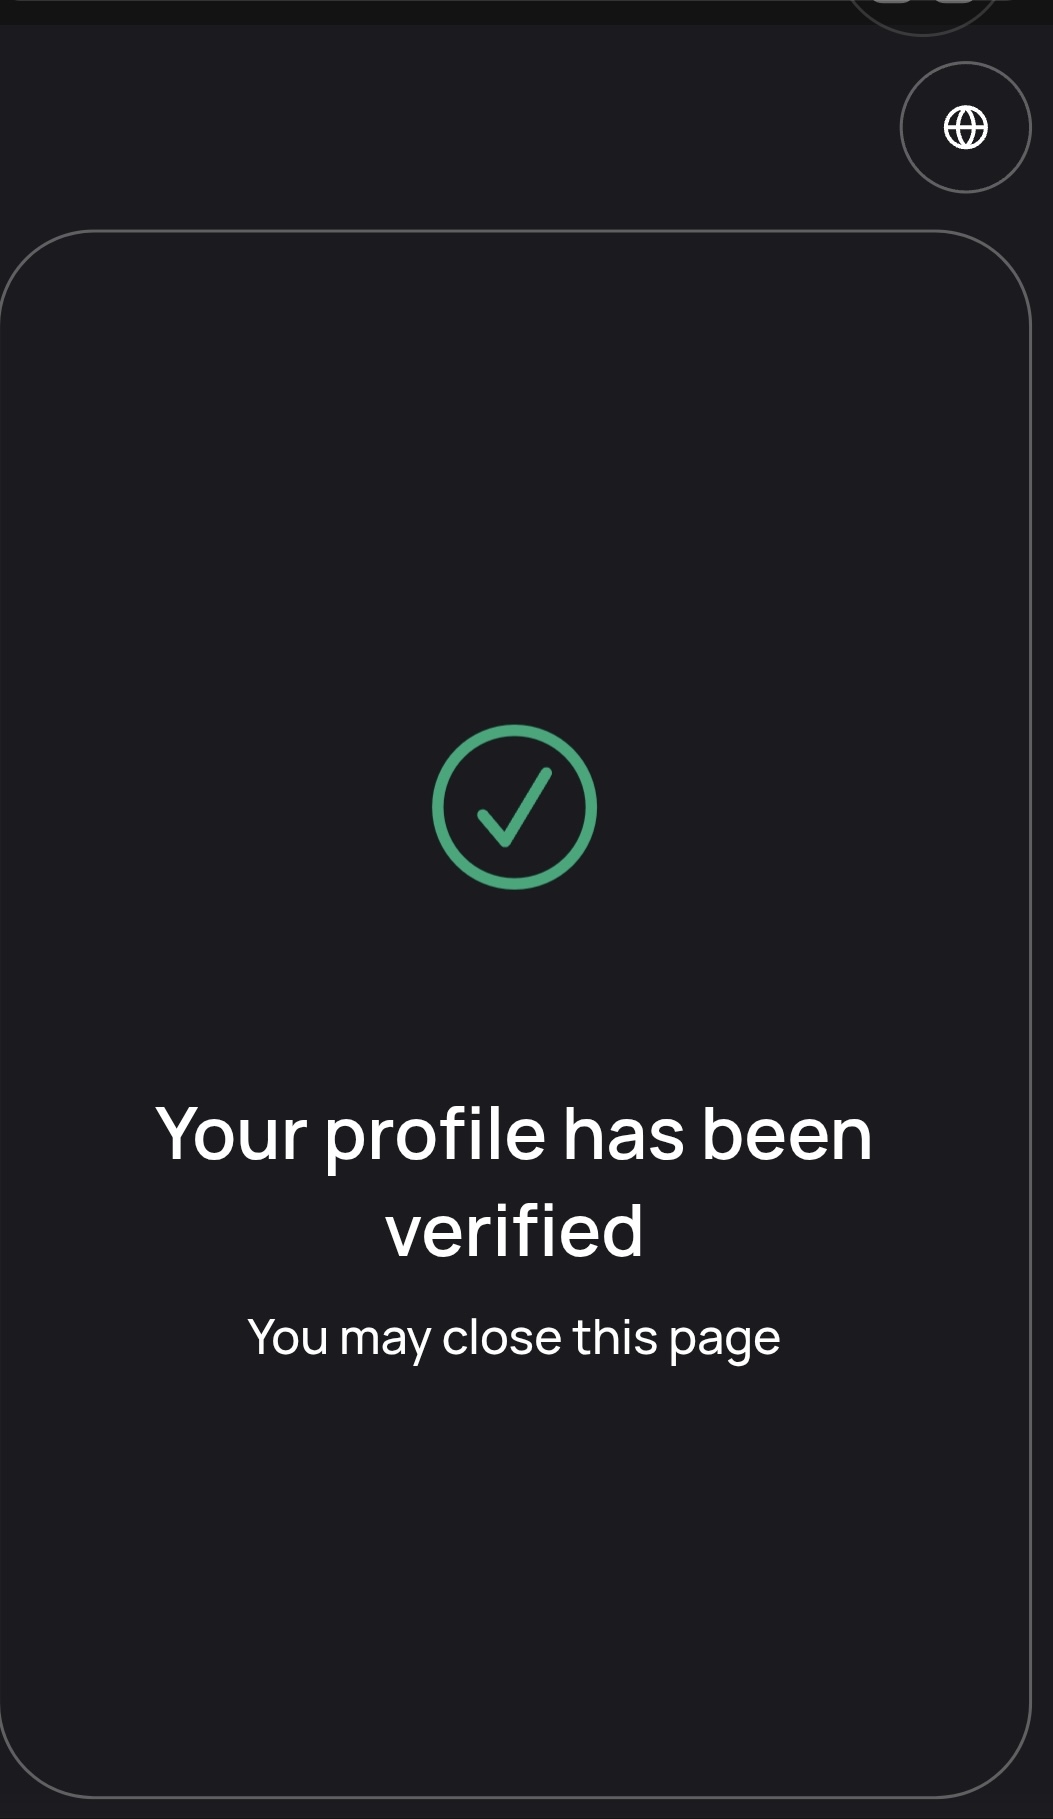
What Happens After You Submit?
-
Your account status will be updated to "Under Review"
-
You will receive an email notification once your verification is approved, or if any additional information is required
-
Processing typically takes 1 business day
No Camera on Your Computer? Here's What to Do
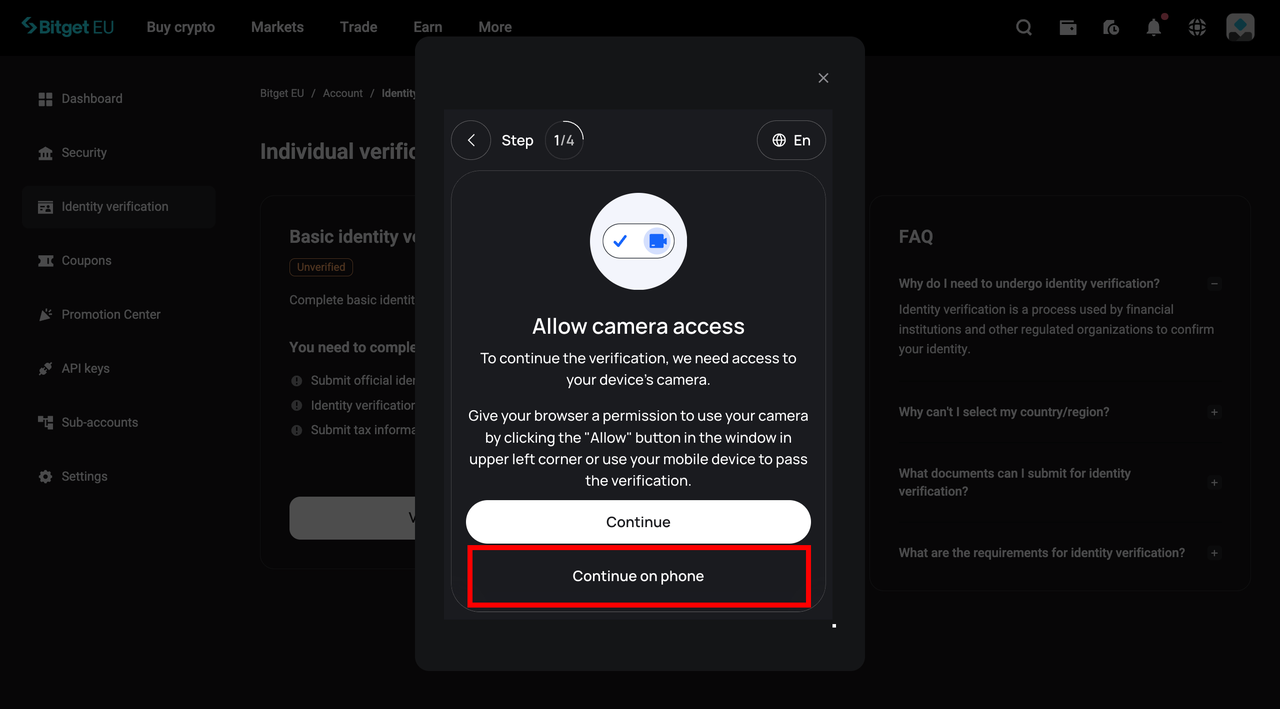
2. A QR code will appear on your screen
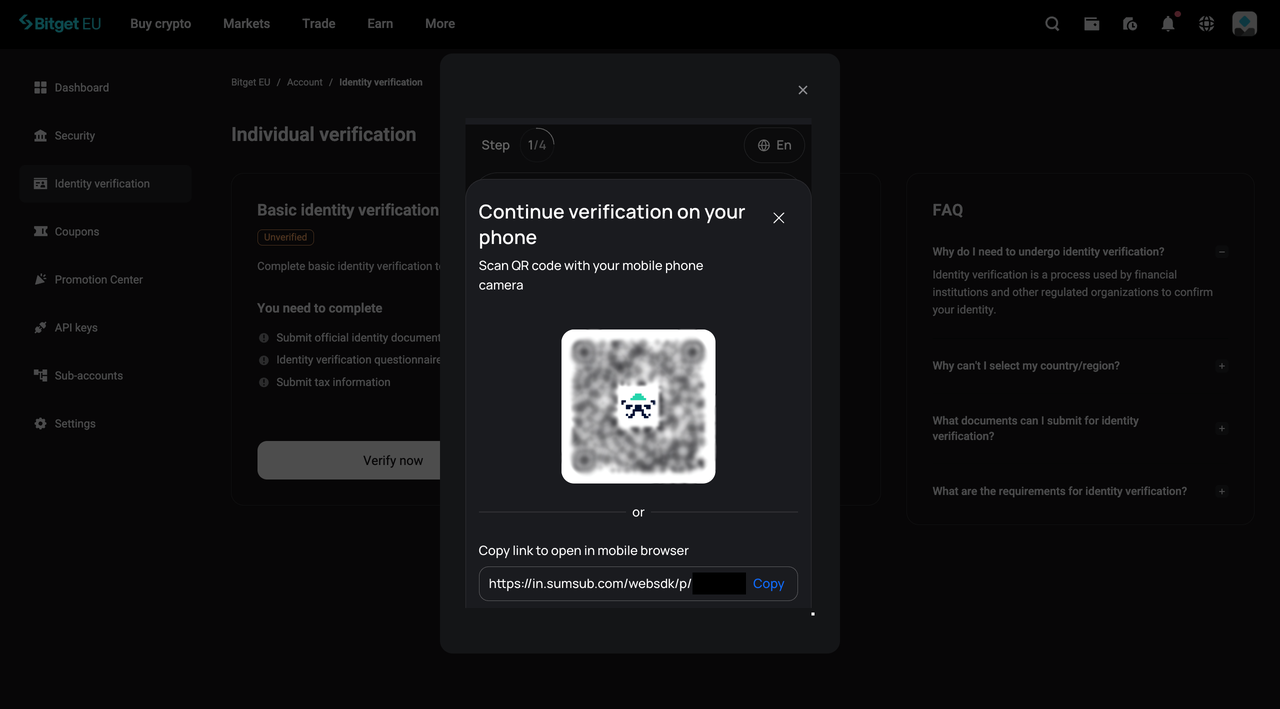
3. Open your smartphone camera and scan the QR code
4. Your phone will open a session-linked continuation of the KYC process
5. Complete the remaining steps on your phone
KYC Tips for First-Time Applicants
-
Use a valid, unexpired government-issued ID
-
Ensure your document has at least 6 months of validity remaining
-
Complete all steps in a single uninterrupted session within the 15-minute window
-
Use a high-resolution camera; blurry document images are a leading cause of rejection
-
Avoid submitting photographs of photographs; always use the original physical document
Frequently Asked Questions (FAQs)
1. How do I check the status of my KYC application on Bitget EU?
2. What should I do if my verification takes longer than 1 business day?
3. What happens if my KYC application is rejected?
-
Blurry or incomplete document images
-
Expired identification document
-
Mismatch between account details and submitted ID
-
Poor lighting during facial verification
4. Is my personal data safe during the KYC process?
5. What is the difference between Express Verification and Video Verification?
Final Thoughts

- What Is KYC and Why Does Bitget EU Require It?
- How Bitget EU Handles Your KYC: Powered by Sumsub
- Before You Begin: What You Will Need
- Step-by-Step: How to Complete KYC on Bitget EU
- What Happens After You Submit?
- No Camera on Your Computer? Here's What to Do
- KYC Tips for First-Time Applicants
- Frequently Asked Questions (FAQs)
- Final Thoughts
 The Uncensored Guide on How to Spot Trade on Bitget EU2026-05-22 | 5m
 Bitget EU VIP Premier Wealth Hub Introduction2026-05-25 | 5m
 How to Buy Crypto With a Credit/Debit Card on Bitget EU2026-05-22 | 5m